Rendering macOS in Virtual Reality
Between 2015 and 2019, I was experimenting with rendering macOS in virtual reality. It started with a VR desktop app for my Oculus DK2, evolved into a SteamVR framework when Apple announced Vive support, and included various Metal and SceneKit experiments along the way. There were almost no resources on macOS VR development at the time, so I had to figure out most of it myself.
The hardware is now obsolete. Oculus dropped Mac support, and Apple's VR ambitions were short-lived. But with Vision Pro bringing spatial computing back to Apple platforms, I thought it was time to share what I learned.
VR Desktop
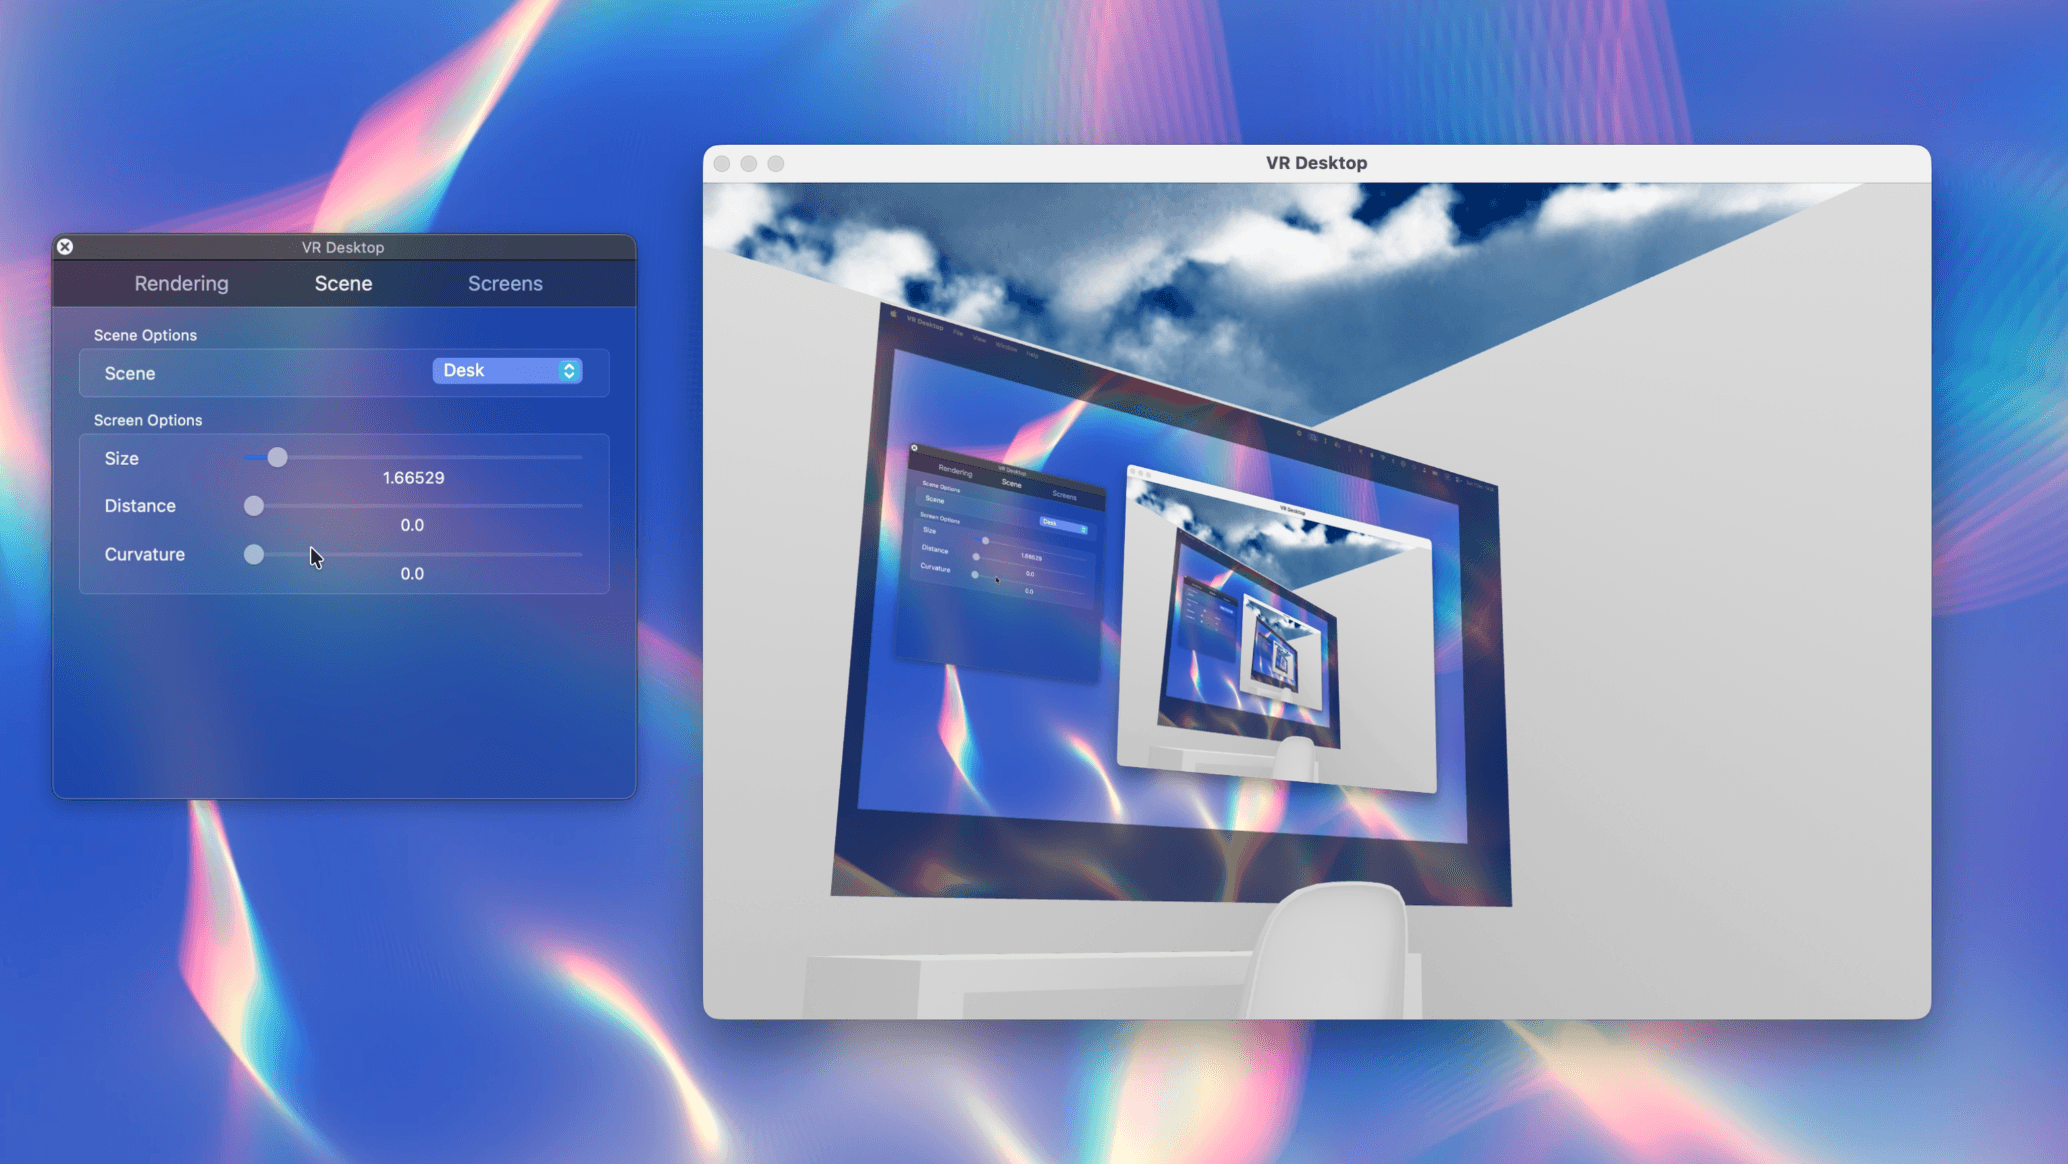
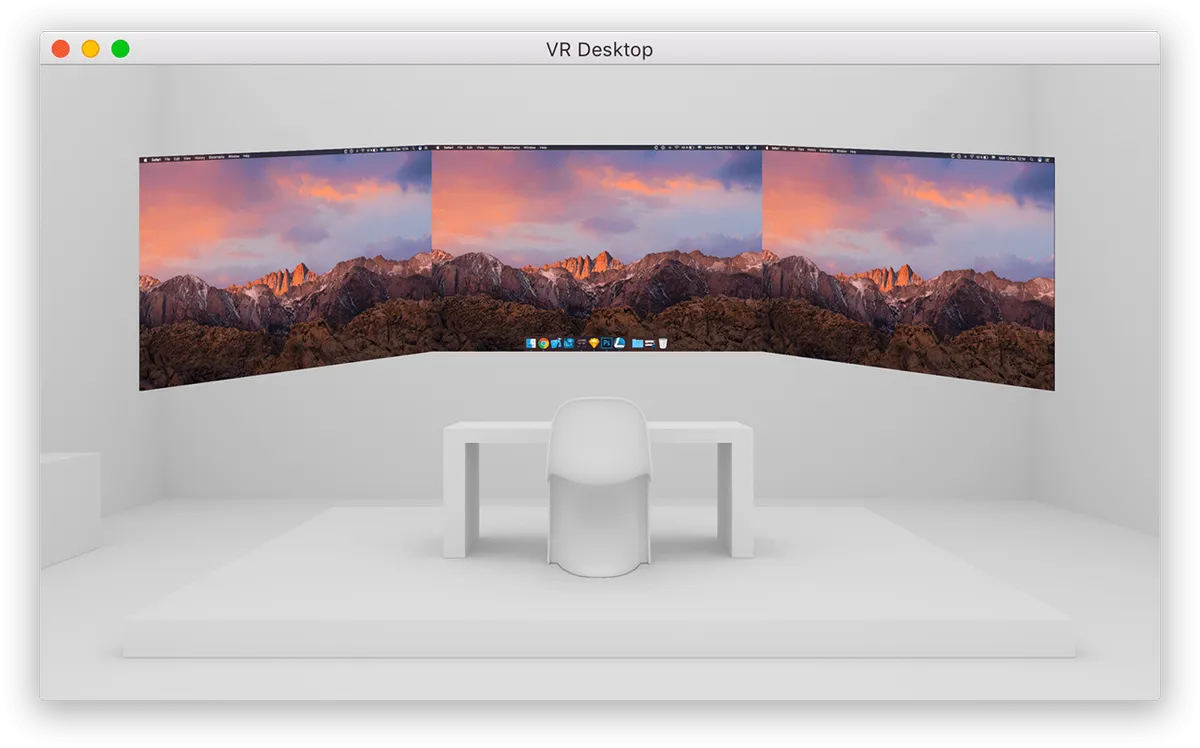
It started with VR Desktop, a full VR desktop application for the Oculus Rift DK2 built with Swift and SceneKit. This was the basis for my thesis project at Lund University. It renders your Mac's screen as a curved 3D surface, lets you resize and position the screen in space, and includes a custom virtual display driver so you can add a "monitor" that exists only in VR. The app came with several built-in scenes and supported both VR headset mode and rendering in a normal NSWindow for development.
Stereo Rendering
For stereo output, VR Desktop uses two separate SCNRenderer instances and renders each eye in parallel:
leftRenderer = SCNRenderer(device: nil, options: nil)
rightRenderer = SCNRenderer(device: nil, options: nil)

dispatch_group_async(renderGroup, leftRenderQueue) {
    leftRenderer.render(at: time, viewport: eyeViewport,
        commandBuffer: nil, passDescriptor: leftPass)
}
dispatch_group_async(renderGroup, rightRenderQueue) {
    rightRenderer.render(at: time, viewport: eyeViewport,
        commandBuffer: nil, passDescriptor: rightPass)
}
dispatch_group_wait(renderGroup, DISPATCH_TIME_FOREVER)
This works, but it's not ideal for performance. Two separate renderers means duplicate scene traversal, duplicate culling, and no shared GPU state between eyes.
Display-Synchronized Rendering
VR needs frames delivered at exact intervals. I used CVDisplayLink to tie the render loop directly to the Rift's display refresh:
CVDisplayLinkCreateWithCGDisplay(displayID, &displayLink);
CVDisplayLinkSetOutputCallback(displayLink, renderCallback, (__bridge void *)self);
CVDisplayLinkStart(displayLink);
The callback fires once per vsync. This prevents tearing and dropped frames, both critical for a comfortable VR experience.
Screen Capture with OpenGL
Apple introduced IOSurface in Snow Leopard (10.6) as a way to share GPU buffer data across processes. For VR Desktop, this was essential: the window server owns the screen's framebuffer, and I needed to display it as a texture without copying pixels through the CPU.
CGLTexImageIOSurface2D binds an OpenGL texture directly to an IOSurface. The GPU reads from the same memory the window server writes to. No copies, no latency from memory transfers.
CGLTexImageIOSurface2D(
    contextObj,
    GL_TEXTURE_RECTANGLE,
    GL_RGBA,
    width, height,
    GL_BGRA,
    GL_UNSIGNED_INT_8_8_8_8_REV,
    surface,
    0
)IOSurface-backed textures require GL_TEXTURE_RECTANGLE, which uses pixel coordinates instead of normalized 0-1 coordinates. This was the only option for zero-copy capture at the time, and it worked well for VR where you're mapping a screen-sized texture onto geometry anyway.
For screen curvature, the vertex shader applies a parabolic transform:
uniform float curve;

void main() {
    vec4 curved = modelViewProjectionMatrix * position;
    curved.z = curved.z + curved.x * curved.x * curve;
    gl_Position = curved;
}
This creates an inward curve based on horizontal position, making the virtual screen feel more immersive.
LibOVR Integration
The Oculus SDK (LibOVR) handles head tracking, lens distortion, and frame timing. Bridging it to SceneKit required some coordinate system wrangling:
- (SCNCamera *)cameraForEye:(EyeType)eye {
    ovrMatrix4f proj = ovrMatrix4f_Projection(
        eyeRenderDesc[eye].Fov, 0.01, 1000,
        ovrProjection_RightHanded | ovrProjection_ClipRangeOpenGL);

    // LibOVR uses column-major, SceneKit uses row-major
    SCNMatrix4 m;
    for (int i = 0; i < 4; i++)
        for (int j = 0; j < 4; j++)
            m.values[i*4+j] = proj.M[j][i];  // Transpose

    SCNCamera *camera = [SCNCamera camera];
    camera.projectionTransform = m;
    return camera;
}
LibOVR also provides TimeWarp (reprojection for late frames) and Overdrive (low-persistence mode for DK2). These were enabled based on hardware capabilities:
caps = ovrDistortionCap_TimeWarp | ovrDistortionCap_Vignette;
if (hmd->Type >= ovrHmd_DK2)
    caps |= ovrDistortionCap_Overdrive;
Virtual Display Driver
VR Desktop's most ambitious feature was creating virtual displays that only exist in VR. This required a kernel extension (kext) implementing IOFramebuffer.
This let the app present high-resolution "virtual monitors" inside VR without physical displays attached.
The driver architecture:
VRDisplayFBDriver (IOService)
└── VRDisplayFBFramebuffer (IOFramebuffer)
    ├── Framebuffer memory (IOBufferMemoryDescriptor)
    ├── VBlank timer (IOTimerEventSource)
    ├── Display modes (up to 32 resolutions)
    └── Cursor state
User space registers via IONotificationPort and responds to connect/disconnect events. The framebuffer memory is directly mapped into the app's address space, so drawing is just writing to memory.
This meant you could have triple 4K workspaces in VR while your physical Mac only had a laptop screen. The only limiting factor was performance. The virtual display appeared in System Preferences like any other monitor, and the placements were reflected in the 3D scene:
// Map NSScreen arrangement to 3D positions
for node in screensNode.childNodes {
    let renderer = (node as! ScreenNode).renderer
    let width = renderer.width / 1000 * size
    let height = renderer.height / 1000 * size
    node.geometry = SCNPlane(width: width, height: height)
    node.position.x = (renderer.screen!.frame.origin.x / 1000 + renderer.width / 2000) * size - xOffset
}
SceneKitMetal
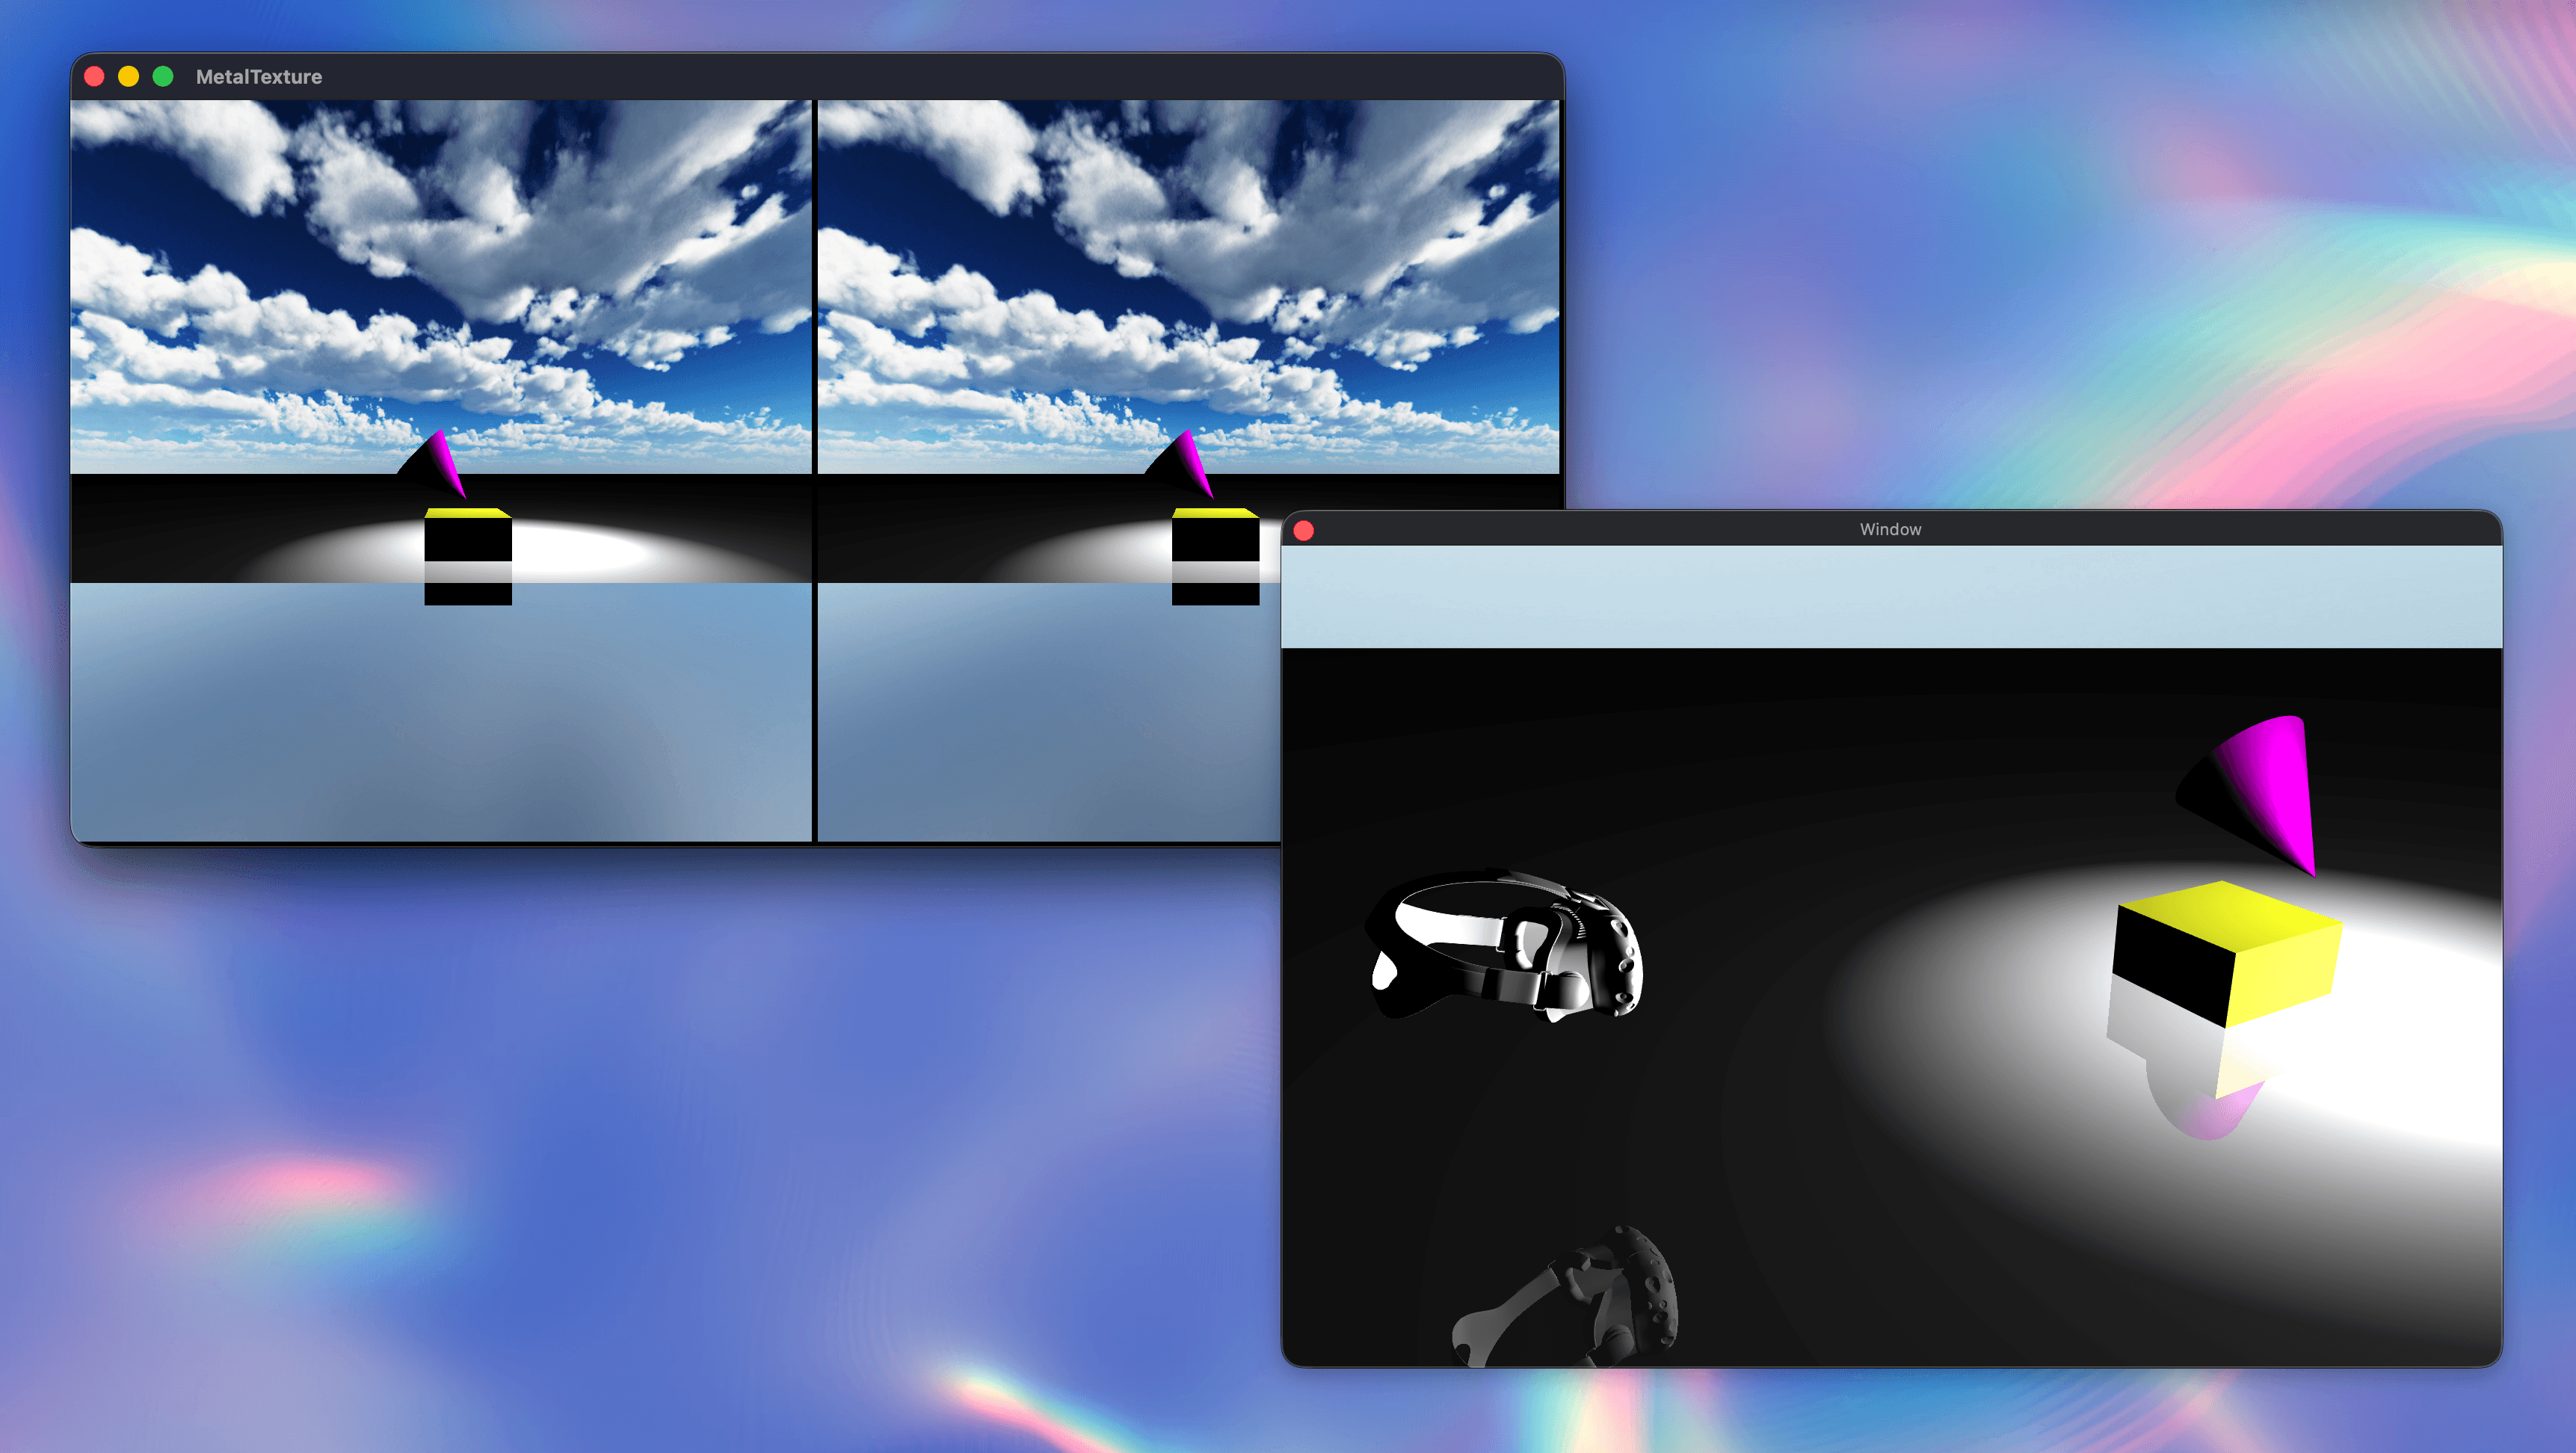
I built SceneKitMetal to figure out how to run custom Metal code alongside SceneKit's own rendering. The goal was to render each eye to a shared IOSurface, then combine them with a compute shader.
Compute Shader Composition
SceneKit owns its render pipeline, but you can still inject compute work between passes. Here's a simple (illustrative) kernel that packs left and right eye textures into a side‑by‑side stereo format:
kernel void StereoComposite(
    texture2d<float, access::read> leftTexture [[texture(0)]],
    texture2d<float, access::read> rightTexture [[texture(1)]],
    texture2d<float, access::write> outTexture [[texture(2)]],
    uint2 gid [[thread_position_in_grid]])
{
    // Write left eye at [0 .. eyeWidth)
    const uint eyeWidth = outTexture.get_width() / 2;
    const float4 leftPixel = leftTexture.read(gid);
    outTexture.write(leftPixel, gid);

    // Write right eye at [eyeWidth .. 2*eyeWidth)
    const uint2 rightGid = uint2(gid.x + eyeWidth, gid.y);
    const float4 rightPixel = rightTexture.read(gid);
    outTexture.write(rightPixel, rightGid);
}
This approach let me add effects like distortion correction or color grading without modifying SceneKit's render path. The IOSurface acts as a handoff point between SceneKit's rendering and custom Metal compute work.
Color Space (sRGB vs Linear)
When mixing SceneKit with a compute pass that writes directly to the window’s drawable, color space matters. For these experiments I disabled SceneKit’s linear‑space rendering so colors matched the sRGB drawable from the compute pass:
<!-- Info.plist -->
<key>SCNDisableLinearSpaceRendering</key>
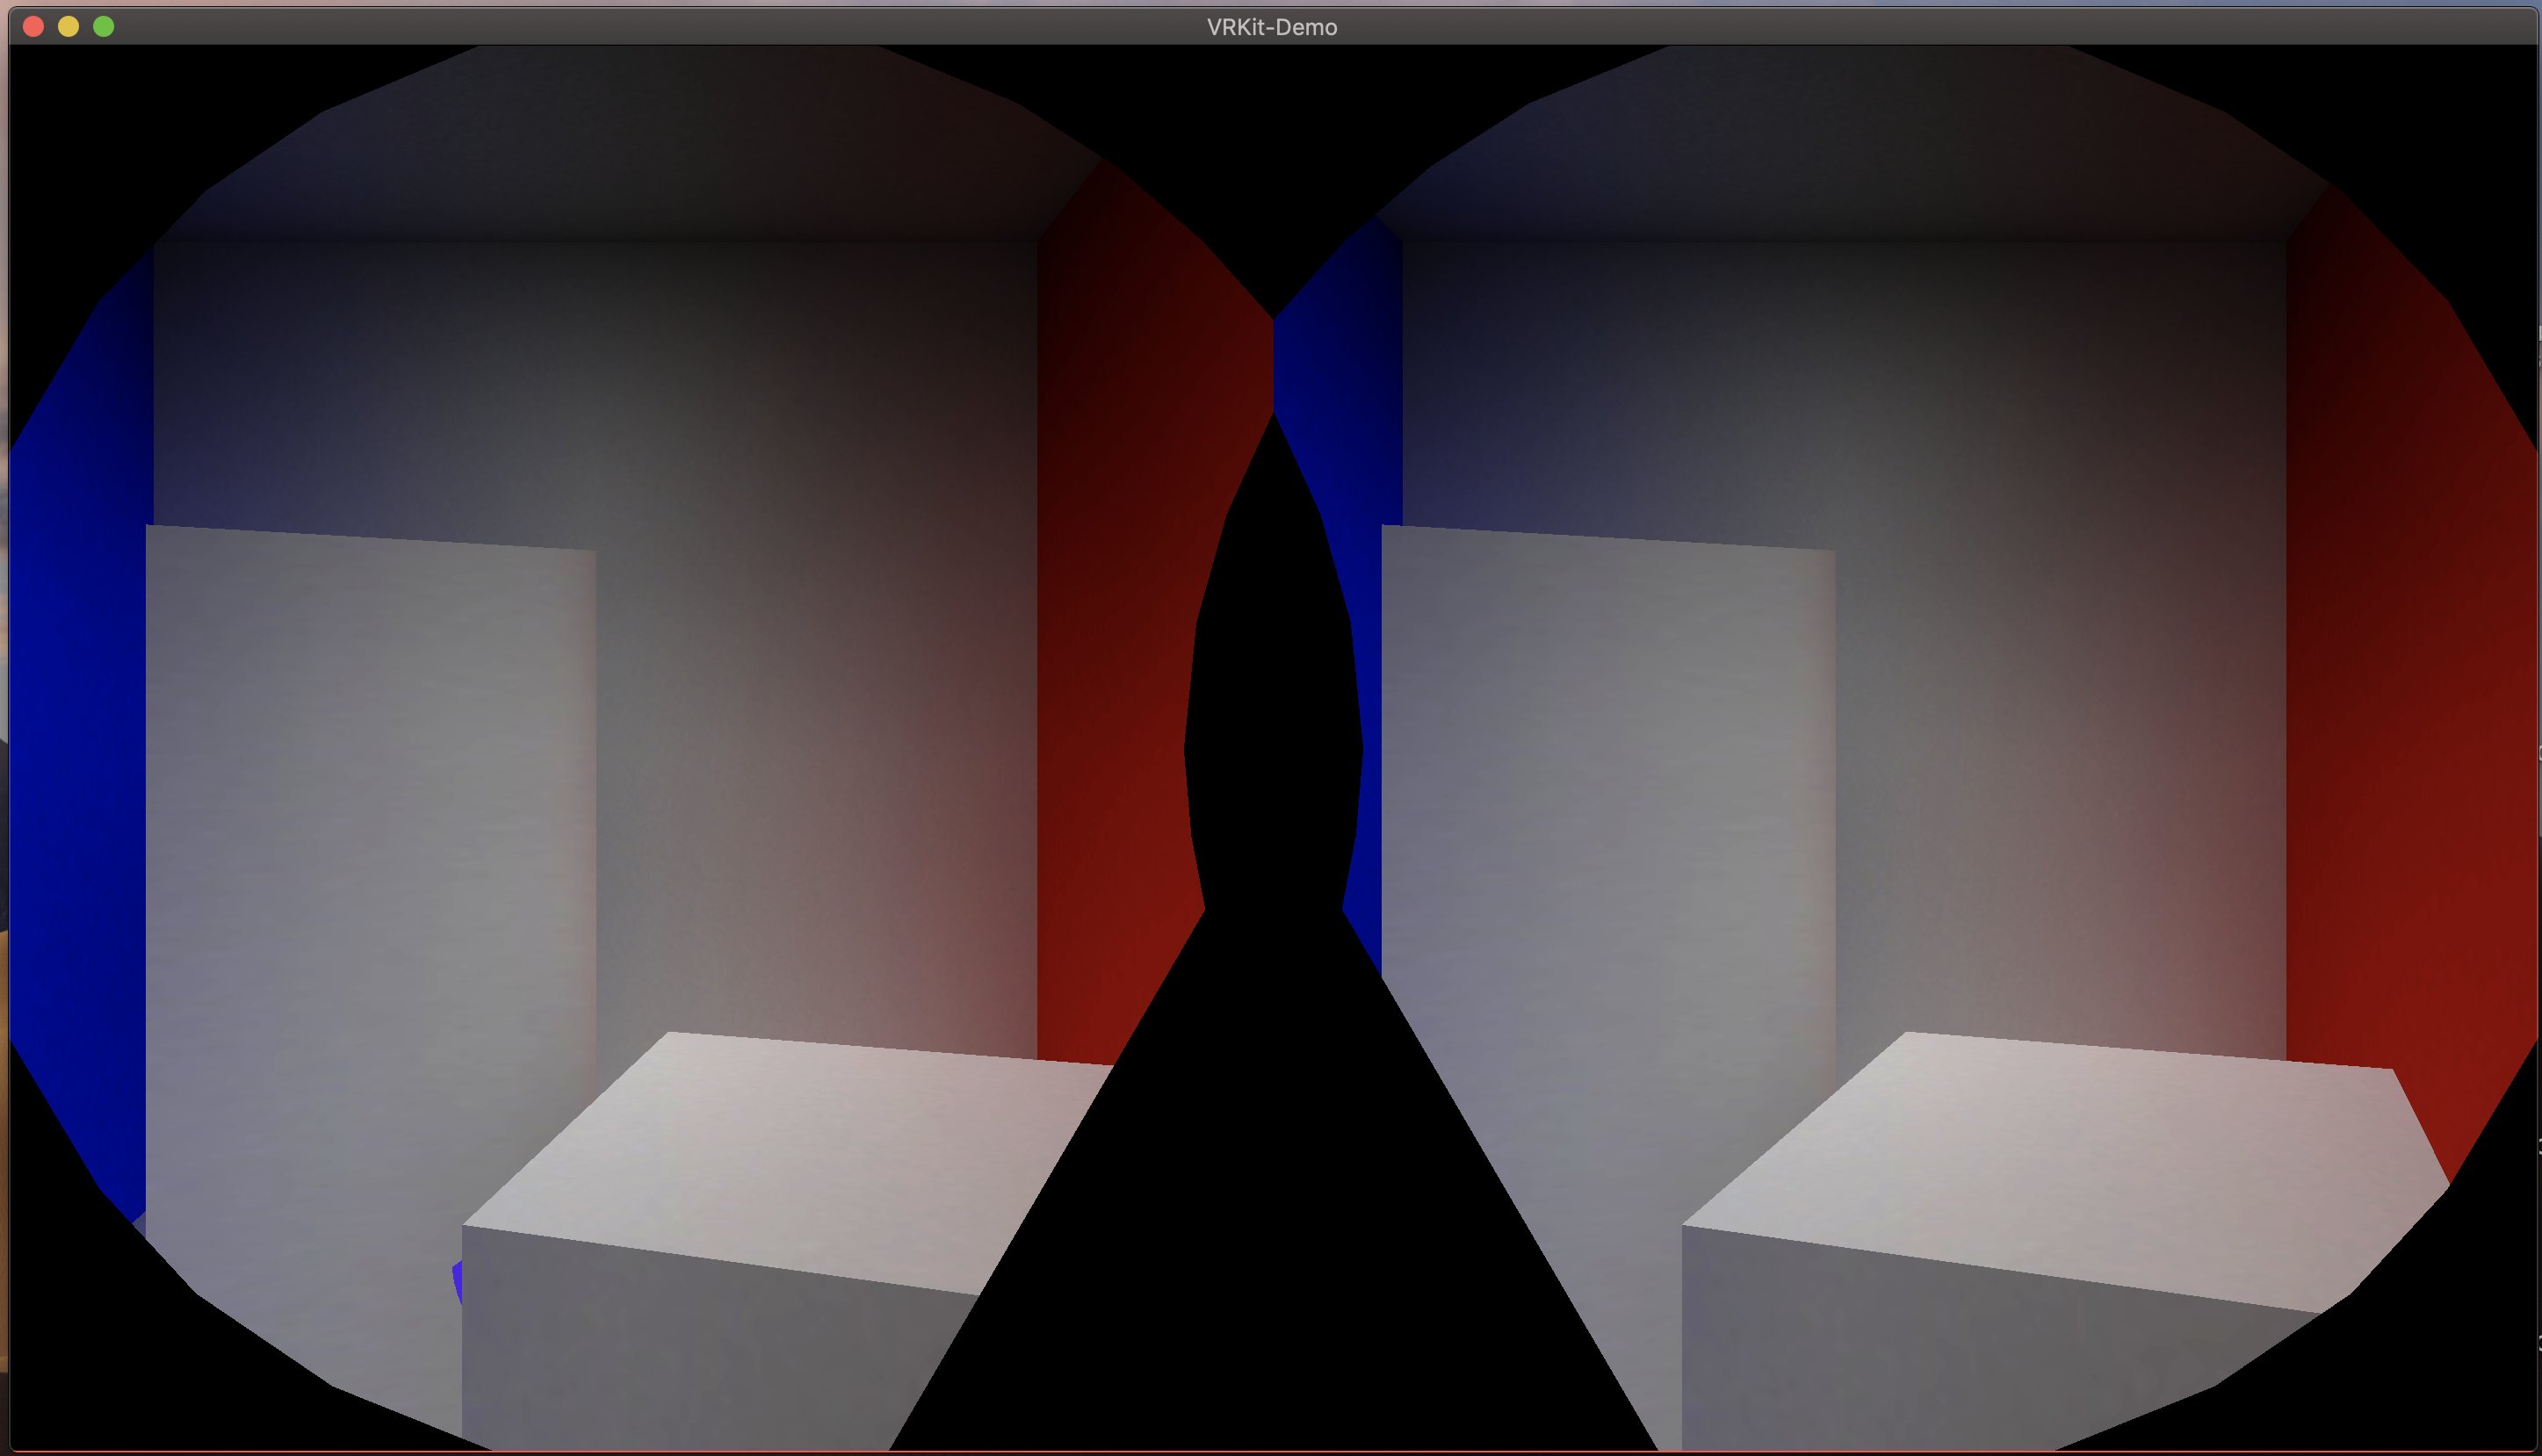
<true/>HMD Preview Rig
For development without a headset, I set up a simple two-camera rig that approximates the wide FOV of VR optics:
let leftEye = SCNNode()
leftEye.camera = SCNCamera()
leftEye.camera?.xFov = 120
leftEye.camera?.yFov = 97.5

let rightEye = leftEye.clone()
head.addChildNode(leftEye)
head.addChildNode(rightEye)
This made it possible to iterate on the stereo rendering pipeline without constantly putting on a headset.
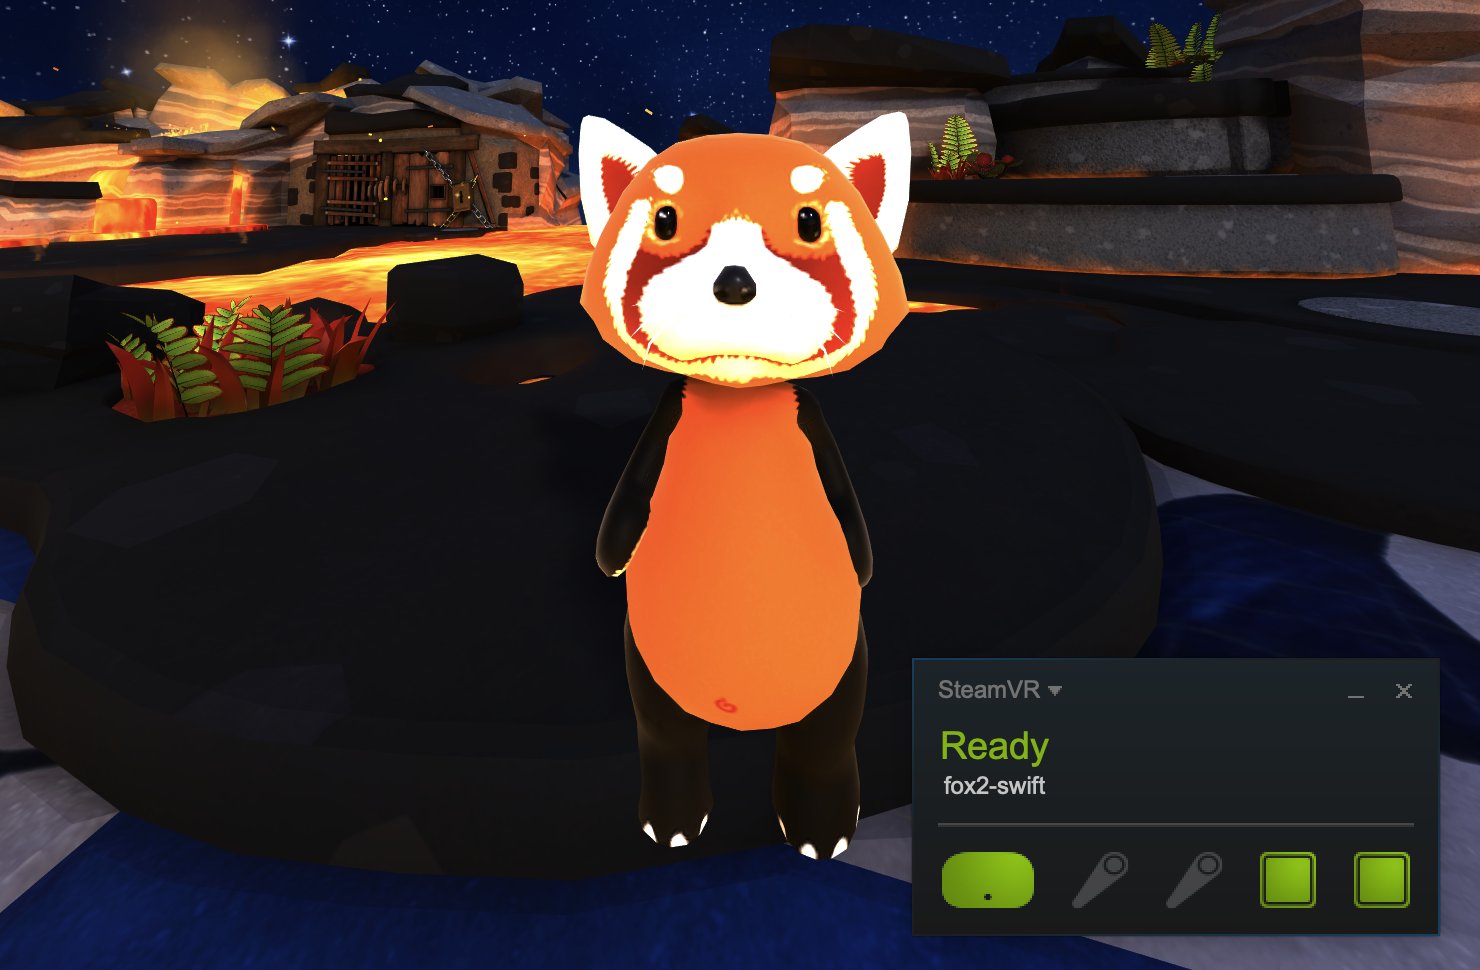
VRKit
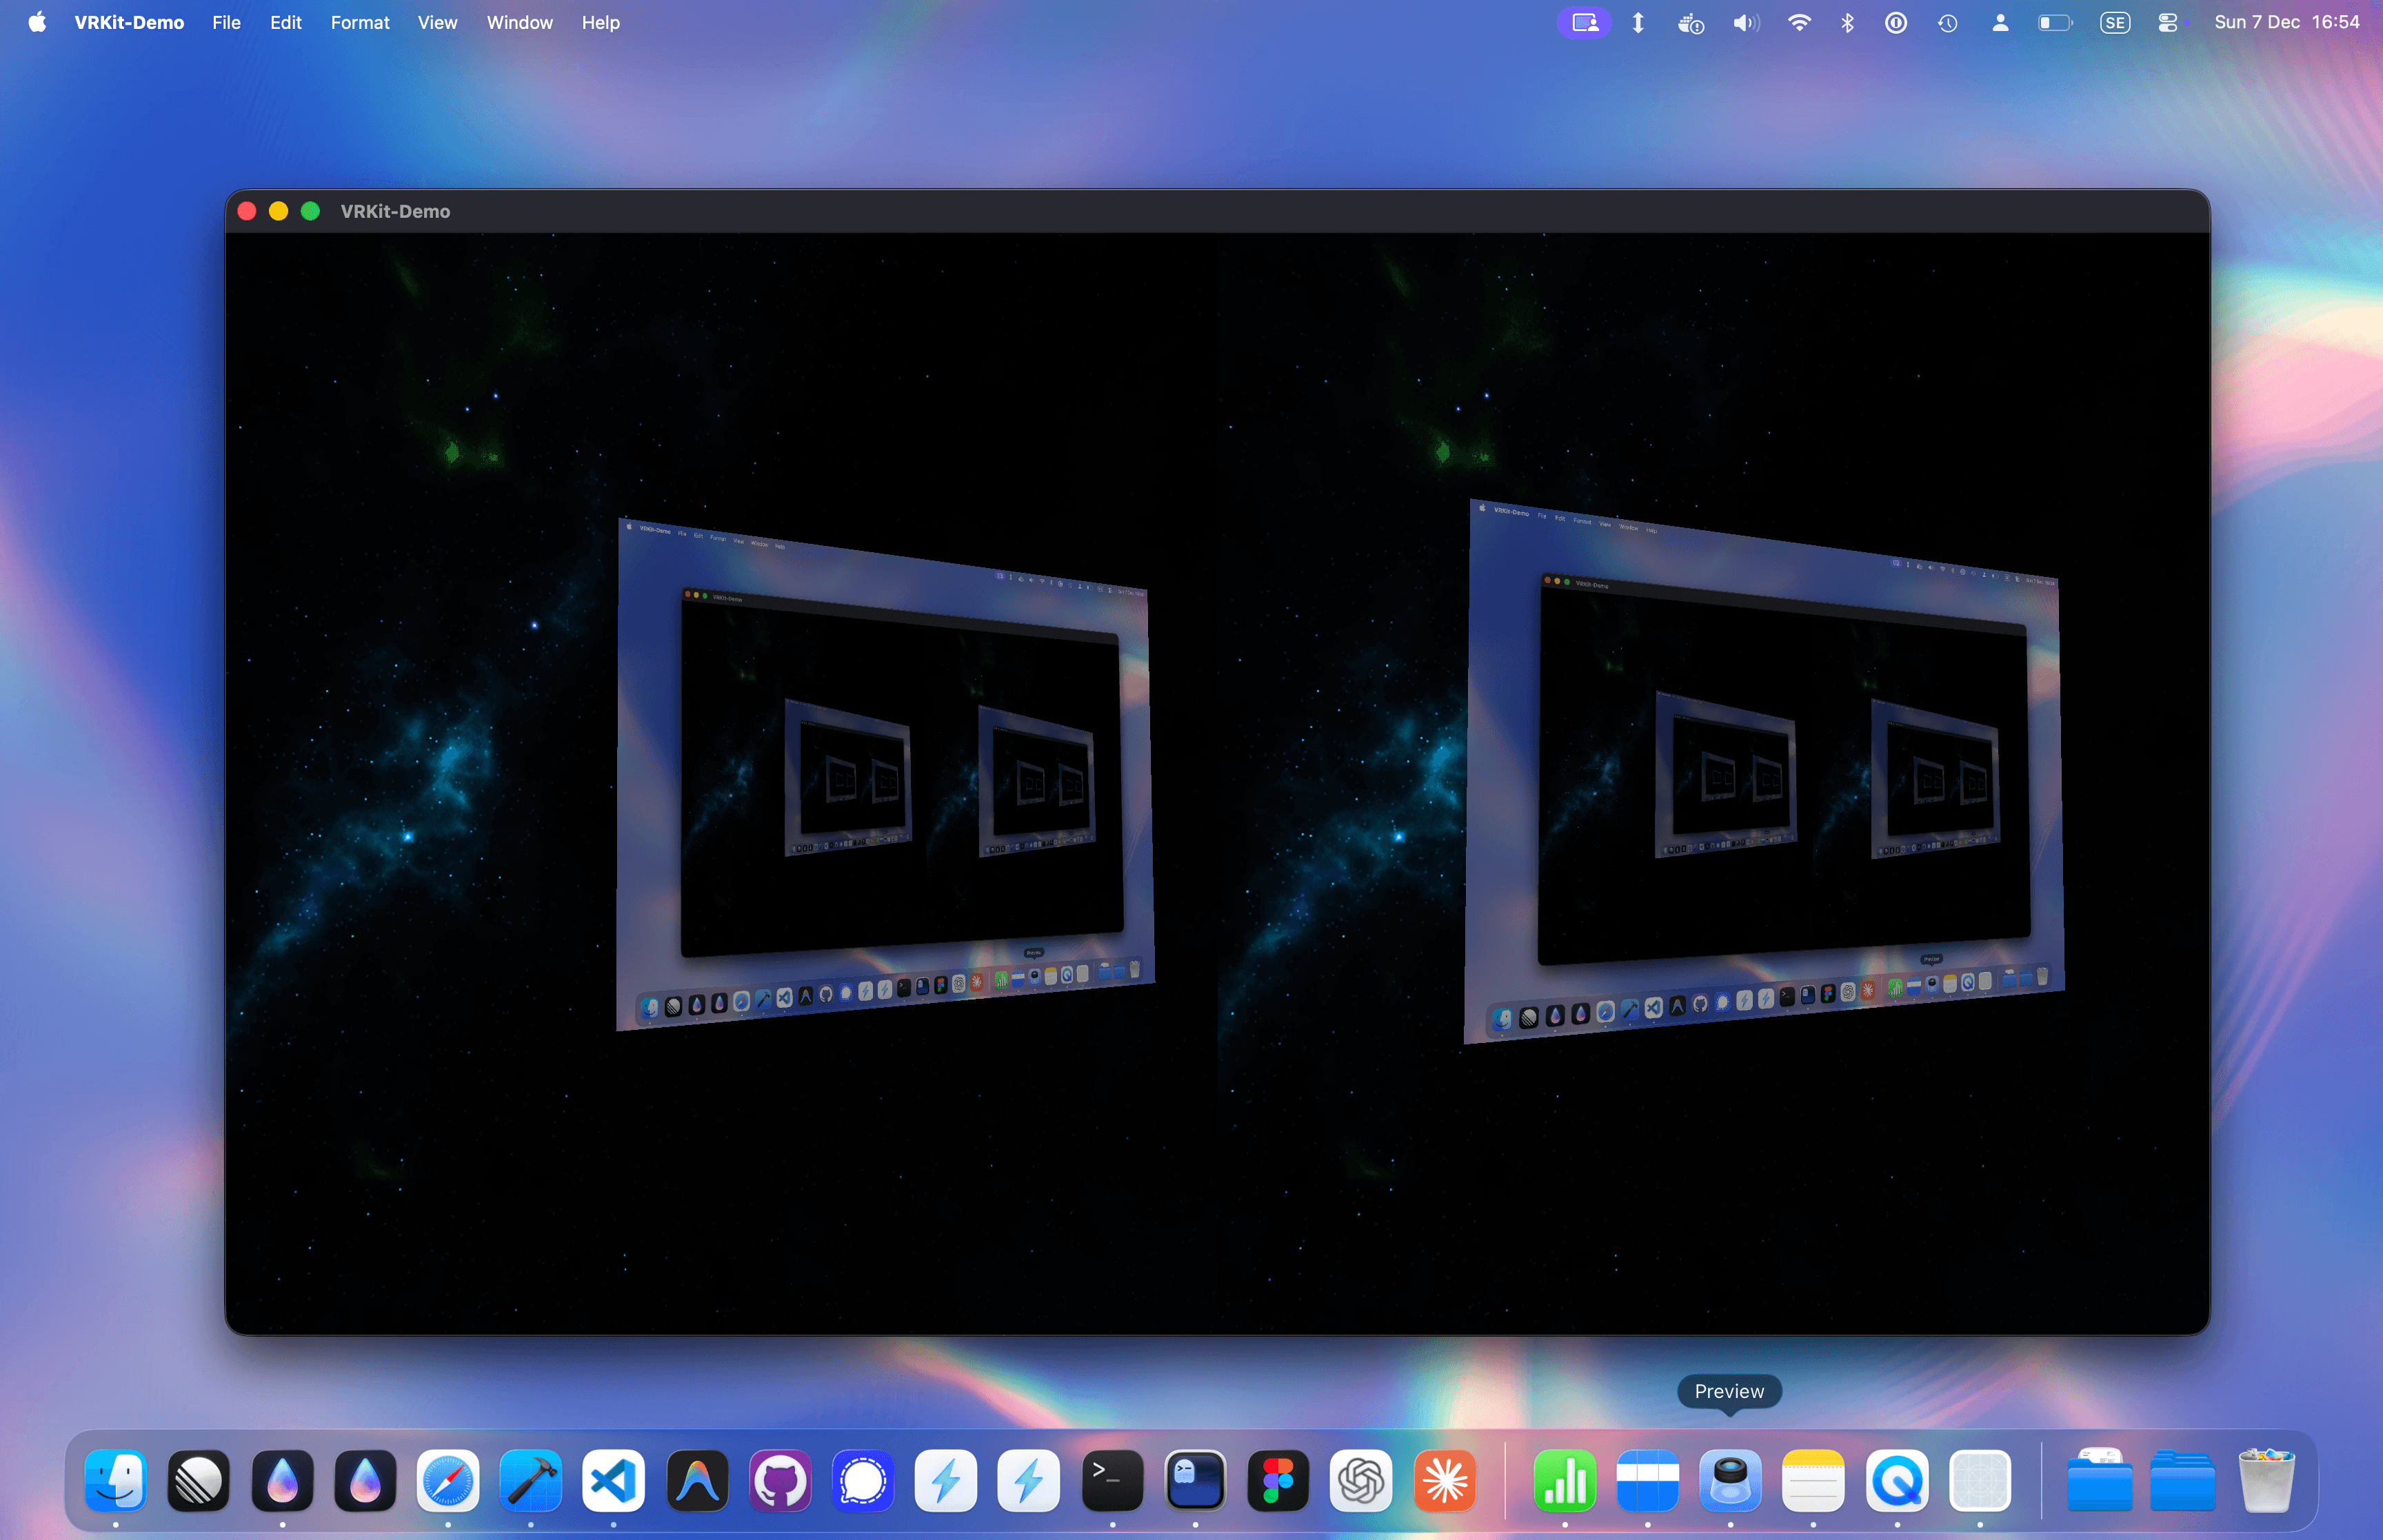
VRKit is a Metal-based stereo rendering framework for SceneKit with SteamVR support. I built it after Valve announced SteamVR on macOS to make any SceneKit scene render in stereo with minimal app changes. I wrote a lightweight Objective-C wrapper around the OpenVR C API so I could call it cleanly from Swift.
SteamVR on macOS
SteamVR runs as a separate compositor process that owns the HMD. The macOS implementation uses IOSurface as the texture handoff mechanism (TextureType_IOSurface in the OpenVR API). You render directly to a global IOSurface, and the compositor reads from it without any copies. This was a big improvement over VR Desktop, where I had to manage the full rendering pipeline myself. With SteamVR, the compositor handles lens distortion, reprojection, and frame timing. My job was just to get pixels into the shared surface as fast as possible.
The OpenVR API is C++, so I built a small Objective-C wrapper (SteamVRBridge) to expose the core functions to Swift:
@interface SteamVRBridge : NSObject

+(void*)initHMD;
+(void)waitGetPoses:(struct TrackedDevicePose_t*)renderPoses ...;
+(UInt32)submit:(enum EVREye)eye texture:(struct Texture_t*)texture bounds:(VRTextureBounds_t)bounds;
+(void)postPresentHandoff;
+(HmdMatrix44_t)getProjectionMatrixForEye:(enum EVREye)eye nearZ:(CGFloat)nearZ farZ:(CGFloat)farZ hmd:(void*)hmdPtr;
+(HiddenAreaMesh_t)getHiddenAreaMeshForEye:(enum EVREye)eye hmd:(void*)hmdPtr;
+(id<MTLDevice>)getOutputDevice:(void*)hmdPtr;

@end
This interface may look simple, but SteamVR was in a rough beta at the time, and I struggled quite a bit to get this working. Thanks to Nat Brown for helping me troubleshoot.
Render Loop
VR requires precise frame pacing. The render loop follows a strict sequence: wait for the compositor, get predicted poses, render, submit, then signal completion:
fileprivate func renderNextFrame() {
    updatePoses()      // WaitGetPoses blocks until compositor is ready
    updateCameras()    // Apply HMD pose to eye cameras
    stereoRenderer.renderNextFrame()
    submitFrames()     // Submit texture + call PostPresentHandoff
}
WaitGetPoses blocks until the compositor is ready for a new frame and returns the predicted HMD position for when the frame will actually be displayed. PostPresentHandoff tells the compositor you're done so it can start its own work immediately.
This is simpler than VR Desktop's CVDisplayLink approach. The compositor owns the timing, so the render loop is just a tight while-true that blocks on WaitGetPoses:
renderQueue.async {
    while true {
        autoreleasepool {
            DispatchQueue.main.sync { self?.renderNextFrame() }
        }
    }
}
Stereo Rendering via Method Swizzling
For VRKit, I wanted to improve my approach to stereoscopic rendering in SceneKit and avoid the overhead of dual renderers. I eventually landed on using runtime method swizzling to intercept all draw calls and convert them to instanced rendering.
public class StereoSwizzler: NSObject {
    private static var hasSwizzled = false

    func swizzle(sourceClass: AnyClass) {
        guard !StereoSwizzler.hasSwizzled else { return }
        StereoSwizzler.hasSwizzled = true

        // Swizzle both draw methods
        if let m1 = class_getInstanceMethod(sourceClass,
               #selector(MTLRenderCommandEncoder.drawPrimitives(type:vertexStart:vertexCount:))),
           let m2 = class_getInstanceMethod(StereoSwizzler.self,
               #selector(StereoSwizzler.drawPrimitives(type:vertexStart:vertexCount:))) {
            method_exchangeImplementations(m1, m2)
        }
        if let m3 = class_getInstanceMethod(sourceClass,
               #selector(MTLRenderCommandEncoder.drawIndexedPrimitives(type:indexCount:indexType:indexBuffer:indexBufferOffset:))),
           let m4 = class_getInstanceMethod(StereoSwizzler.self,
               #selector(StereoSwizzler.drawIndexedPrimitives(type:indexCount:indexType:indexBuffer:indexBufferOffset:))) {
            method_exchangeImplementations(m3, m4)
        }
    }

    @objc func drawPrimitives(type: MTLPrimitiveType, vertexStart: Int, vertexCount: Int) {
        (self as! MTLRenderCommandEncoder).drawPrimitives(
            type: type, vertexStart: vertexStart, vertexCount: vertexCount,
            instanceCount: 2
        )
    }

    @objc func drawIndexedPrimitives(type: MTLPrimitiveType, indexCount: Int,
                                      indexType: MTLIndexType, indexBuffer: MTLBuffer,
                                      indexBufferOffset: Int) {
        (self as! MTLRenderCommandEncoder).drawIndexedPrimitives(
            type: type, indexCount: indexCount, indexType: indexType,
            indexBuffer: indexBuffer, indexBufferOffset: indexBufferOffset,
            instanceCount: 2
        )
    }
}
Both drawPrimitives and drawIndexedPrimitives need swizzling since SceneKit uses indexed draws for most geometry. Combined with a vertex shader that routes instances to different viewports based on [[instance_id]], you get stereo rendering from any SceneKit scene with zero modifications to the scene graph.
The vertex shader uses the instance ID to select the appropriate eye transform:
vertex VertexOut stereoVertex(VertexInput in [[stage_in]],
                              constant EyeBuffer& eyes [[buffer(2)]],
                              ushort iid [[instance_id]]) {
    VertexOut out;
    out.position = eyes.mvp[iid] * float4(in.position, 1.0);
    out.viewport = iid;  // Routes to left (0) or right (1) viewport
    return out;
}
This is more efficient than the dual-renderer approach in VR Desktop: one scene traversal, one culling pass, and shared GPU state between eyes.
Despite requiring quite ugly workarounds, staying with SceneKit was pretty beneficial. For example, it meant that I could simply add VR support to pretty much any SceneKit-compatible scene.
Viewport Arrays
The instanced draws render to a single wide texture using Metal viewport arrays:
private func buildViewports(width: Double, height: Double) -> [MTLViewport] {
    return [
        MTLViewport(originX: 0, originY: 0, width: width, height: height, ...),
        MTLViewport(originX: width, originY: 0, width: width, height: height, ...)
    ]
}

func renderer(_ renderer: SCNSceneRenderer, willRenderScene scene: SCNScene, ...) {
    renderer.currentRenderCommandEncoder?.setViewports(viewports)
}
Combined with the swizzled instance ID, each draw automatically goes to the correct eye.
One caveat is that SceneKit's frustum culling depends on the renderer's active camera. To avoid overdraw or underdraw, VRKit sets scnRenderer.pointOfView = leftEye so culling is performed from an eye's perspective.
Compositor Handoff
Submitting frames to SteamVR requires some setup. The IOSurface needs kIOSurfaceIsGlobal: true so the compositor process can access it:
let prop: [IOSurfacePropertyKey: Any] = [
    .width: eyeSize.width * 2,
    .height: eyeSize.height,
    .bytesPerElement: 4,
    kIOSurfaceIsGlobal as IOSurfacePropertyKey: true
]
surface = IOSurfaceCreate(prop as CFDictionary)!
On multi-GPU Macs, you also need to render on the same GPU as the compositor. getOutputDevice returns the correct Metal device:
+(id<MTLDevice>)getOutputDevice:(void *)hmdPtr {
    id<MTLDevice> device;
    ((vr::IVRSystem*)hmdPtr)->GetOutputDevice((uint64_t*)&device, vr::TextureType_IOSurface);
    return device;
}
Zero-Copy Screen Capture with IOSurface
To display the Mac's screen in VR, I had to capture it as a texture. Copying pixels through the CPU was too slow, so I used CGDisplayStream with IOSurface for zero-copy GPU sharing:
displayStream = CGDisplayStream(
    dispatchQueueDisplay: screen.displayID(),
    outputWidth: width,
    outputHeight: height,
    pixelFormat: Int32(k32BGRAPixelFormat),
    properties: options,
    queue: queue
) { (status, code, frameSurface, update) in
    if status == .frameComplete, let surface = frameSurface {
        IOSurfaceLock(surface, [.readOnly], nil)
        IOSurfaceIncrementUseCount(surface)

        // Create Metal texture directly from the IOSurface - no copy!
        let texture = device.makeTexture(
            descriptor: desc,
            iosurface: surface,
            plane: 0
        )

        IOSurfaceUnlock(surface, [.readOnly], nil)
    }
}
Since IOSurface is shared memory, you can create a Metal texture directly from it and read from the window server's framebuffer without any CPU copies.
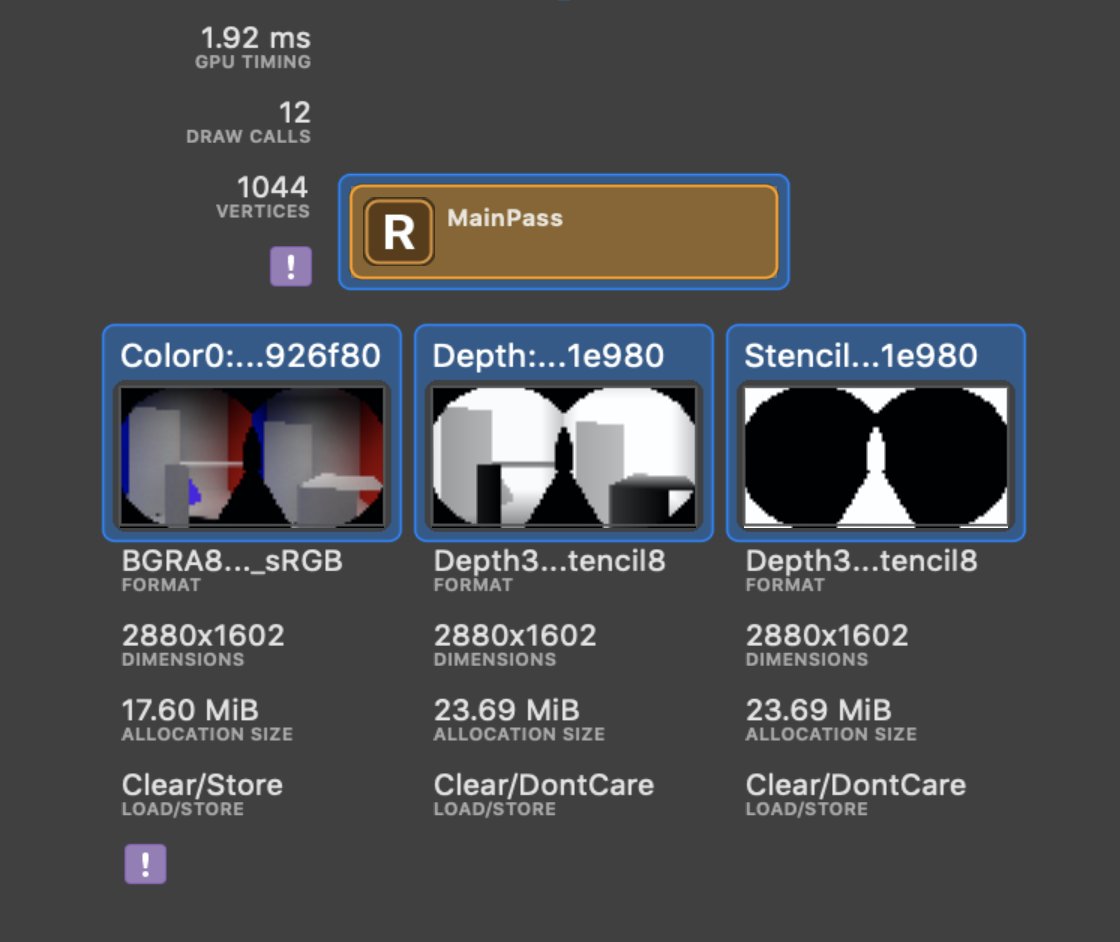
Hidden Area Mesh
VR lenses don't show the full rendered frame, so rendering pixels in the corners is wasted work. OpenVR provides a "hidden area mesh" for each eye that marks the invisible region. The mesh data is pre-baked per headset and loaded at startup:
static func importStencils() -> [HiddenAreaMesh_t] {
    for index in 0..<2 {
        let eye = (index == 0) ? "Left" : "Right"
        let data = try! Data(contentsOf: Bundle.main.url(
            forResource: "Vive\(eye)HiddenArea",
            withExtension: "mesh"
        )!)
        // Parse and create vertex buffers...
    }
}
VRKit then uses this mesh to set up a stencil buffer, skipping fragment shading outside the visible area:
func encodeStencil(encoder: MTLRenderCommandEncoder, viewports: [MTLViewport]) {
    encoder.setViewports(viewports)
    encoder.setStencilReferenceValue(1)  // Mark valid pixels

    for (index, stencil) in stencilBuffers.enumerated() {
        var viewport = index
        encoder.setVertexBytes(&viewport, length: MemoryLayout<Int>.size, index: 1)
        encoder.setVertexBuffer(stencil.vertexBuffer, offset: 0, index: 0)
        // Important: instanceCount: 1 to avoid triggering our swizzle!
        encoder.drawPrimitives(type: .triangle, vertexStart: 0,
            vertexCount: stencil.vertexCount, instanceCount: 1)
    }
}
Lessons Learned
I ended my experiments with VR on the Mac in 2019. A year later, Valve officially dropped SteamVR support on macOS.
When I started this journey, I had zero experience with graphics programming. Building a virtual desktop environment for macOS was pretty daunting. The platform was also changing fast: the transition from OpenGL to Metal, the rise and fall of official VR efforts on Mac (eGPUs, Oculus support, SteamVR with the Vive). Even SceneKit is now soft-deprecated. None of this work resulted in a shipped product, but I learned a lot about graphics programming, macOS internals, and product philosophy:
-
Graphics programming is hard. In addition to the projects I talked about here, I also experimented with building my own 3D engine in Metal from scratch, and eventually got a prototype working. But the sheer amount of work around rendering pipelines, shaders, and linear algebra turned into a monster of a project that left me no time to actually improve on the VR part. I eventually leaned back on SceneKit, with increasingly hacky workarounds for optimizing stereoscopic rendering.
-
Don't bet on shifting platforms. I built on eGPU support, the Oculus SDK, and SteamVR for Mac. All deprecated or abandoned. The ground kept moving under my feet, and each pivot meant rewriting significant chunks of code. If a platform feature feels experimental, it probably is. This is especially true for Apple frameworks, which have a habit of losing traction fast. SceneKit is now soft-deprecated, and I wouldn't be surprised if RealityKit eventually follows.
-
Build products, not features. Building small products on a large platform is risky. If what you're building feels like a natural platform feature, the vendor will probably sherlock you by shipping it themselves. A mainstream VR desktop environment for Mac was always going to be Apple's to ship, not mine. Apple eventually released Vision Pro with the ability to interact with macOS and create virtual displays. The same features I prototyped with VR Desktop, nearly a decade earlier.
Source and Extras
The full source is available at github.com/OskarGroth/VRKit.
These projects are provided for educational purposes. Both VR Desktop and VRKit include non-HMD preview modes, so you can build and run them on any Mac. The DK2/Vive support is there, but it requires Intel Macs and probably older versions of macOS.
![]()
The repo also includes the original Sketch source file for the VR Desktop icon I designed back in 2017. It was featured in an article on the Sketch blog.